Powered By Blogger

Monday, April 17, 2017

Dandelion Salve

Once I learned the potency and benefits of dandelions, one of the first recipes I tried was a salve. I make no claims to being a doctor, but I love the way this salve makes me feel.

I've used the salve for winter dryness. I've used it on cuts and scrapes. I used it on a rash my son had and, maybe it was the dandelion - maybe it was the olive oil - maybe it was the coconut oil - Regardless of what it is, this has worked better for me than any store-bought medical ointment I've used for cuts and scrapes.

Start by picking the dandelions from an organic location - I pick dandelions from our yard until we mow. After that, I prefer not to run the risk of ingesting or otherwise rubbing dandelions on me that may have been contaminated by gasoline or oil.


Pick about 2 cups of dandelion heads. You may want to dry them out a touch by letting them sit on a clean pan for a few hours. I put parchment paper down, first. The natural milky fluid in a dandelion can sometimes turn a bit sludgy while it is infusing with the olive oil. 

Pour about 2 cups of good quality olive oil over the dandelion heads and let them infuse for a couple weeks. I kept mine in the kitchen, but on sunny days, would let it sit in the sun to aid in the infusion process. 


After a few weeks (I think this batch sat for 2 weeks), strain the heads pushing down on them with a spatula or spoon to extract as much infused oil as possible from the heads. Discard the heads as you wish - either in the trash or compost heap.

One bit of advice - drain the oil directly into a bowl that you can use as a double-boiler in a pot of water. It makes the steps much easier and keeps you from dirtying more dishes.


 Another thing to consider before you begin is from where to purchase your beeswax. You want to use beeswax that is easy to measure as well as of good quality. The kind I buy is in little pellets - easy to measure out and easier to melt. 

Using a double-boiler technique, warm the oil and beeswax together. I added about 3/4 cup of beeswax to the oil I had in the bowl.


 As the beeswax is melting, add whichever scent of essential oil you prefer. My first batches I used honeysuckle - it was delightfully light and relaxing. This batch, I used lavender oil. It blends well with the scent of dandelion. You'll want to stir it in, wait a few minutes for the wax to melt further, then smell it again to see if it needs more. I've found that as the wax melts, it absorbs the essential oil.


It is really quite lovely as the pellets swirl in the oils!


It felt like it took forever for the wax to melt. But when it did, it happened all at once.


At this point, you want all your containers sitting out and ready for you to fill. I recommend you add a spoonful to one tin, then set it in the freezer to encourage it setting. After it sets, test the consistency of the salve. You want to make sure it is not too thick with wax and that it rubs in nicely. 

My first batch, I followed a recipe that said to melt coconut oil into the olive oil and beeswax. I liked that batch, but it was too oily for me - it didn't soak into my skin well and the salve melted too easily for my taste. Even with the air conditioning in summer, the top of my container would have melted salve on it. This time, I refrained from adding the coconut oil as I wanted something more suitable to travel as well as a salve that soaked in better and was less greasy.


My finished containers! 
I was very happy with the consistency of the salve after I cooled the test container. My jars took longer to cool than the tins, but my son and I left to run errands and when I got back, the salve was ready to pack up.

Dandelion Salve

2 cups of dandelion heads (organic)
2 cups of good quality olive oil
-Infuse for several weeks
Essential Oil of your choice

You'll need a double-boiler, strainer, and tins or jars for holding the salve.

If you try this, I'd love to know how you fare! Let me know if you try other scents and how they turned out. I'm really tempted to try one with eucalyptus and rosemary as a muscle rub, but I'll have to find a field that hasn't been mowed, yet, as we finally gave in and mowed our lawn this weekend. 

Happy foraging!

Tuesday, April 4, 2017

Dandelion Cookies

Continuing on with my fascination of dandelions (and their light floral scent and taste, plus their incredible health benefits...), my son and I made dandelion cookies this past weekend. If you recall, I attempted to make Dandelion Jelly earlier this spring. But more dandelions have since bloomed, and we have not yet mowed, so dandelions I must use whilst I can. 


My son begins to prep the bright, open flowers (only use fully ripe blooms from dandelions that have been picked in clean areas - no mowing, no nearby car exhaust, no spraying for weeds, etc.) by snipping the yellow petals and stamens from the bloom heads. You'll need about 1/2 cup of these, which you'd think isn't much, but surprisingly, will not fill as quickly as you'd expect. Thankfully, I had quite the number of perfect dandelions in my yard.


 Save the part you don't use. I collected these to put into a jar for making salve - with the heads I collected that I did not use.

**You can freeze the heads, but be careful of ice crystals and their subsequent added moisture when you thaw them. Depending on what you're making, you will  want to dry them slightly before adding to the recipes.


My son is adding the remaining heads and the shorn heads to a large jar, to which I will add enough good quality olive oil to begin soaking the heads to make my salve.


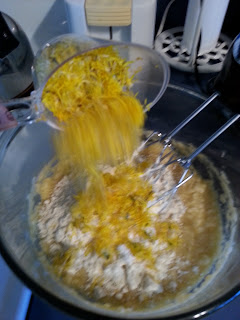
Add the flower shavings to your batter, mix, and drop in dollops on a parchment paper covered cookie sheet. Bake approximately 15 minutes, allow to cool, and enjoy!


They're so pretty!


Mine spread and ended up more like tuiles than cookies. But that did not diminish their taste. They're lovely. They're light and slightly-floral. And they didn't last.

Dandelion Cookies

1/2 cup coconut oil
1/2 cup honey
1 cup of gluten-free flour
2 eggs
1 Teaspoon vanilla
1 cup of oatmeal
1/2 cup of dandelion flowers

Preheat the oven to 375*.
Whip together the wet ingredients. 
Sift together the dry ingredients. 
Fold into one another. 
Fold in the flower petals. 
Drop by spoonfuls onto a parchment paper covered cookies sheet.
Bake approximately 15 minutes, or until lightly browned, and allow to cool.
Enjoy!

They're healthy, easy, and won't last! Let me know what you think of these!

Saturday, April 1, 2017

Dandelion Jelly... er.. Dandelion Syrup

I am new to the wonders of dandelions. I'd heard of eating the greens as long as I can remember, but... dandelions are weeds, right? Really best reserved for blowing the puffs around or merely omnipresent in a child's memory of summer days, bike riding and kickball playing - complete with drinking water out of the hose at your neighbor's house. Who would've thought I'd find myself, years later, wandering through my yard, picking the beautifully yellow heads of this weed?

Last spring, after searching for some recipes on the internet for honeysuckle, I came across a page that talked of the advantages of dandelion. Curious, I began to research the use of dandelion for many recipes as well as ills. 

I am not a doctor. However, I have found that, for flavor alone, I really appreciate the earthiness of dandelion tea, and I've seen firsthand the benefits of dandelion salve. I'll post instructions for those another time. Today is all about dandelion jelly!


I usually pick this bowl full - I'm not positive how much it holds. I would guesstimate that it is around 5 cups. I know I didn't need this many, but I couldn't let them go to waste! 

**Be sure to only pick dandelions from a yard that is not near a street, nor one that has been sprayed for weeds, etc. You'll be ingesting these, and you don't want remnants of exhaust, weed killer, or gasoline on them! I pick dandelions only until we begin mowing, and then I must say goodbye to my lovely concoctions. 


Next, I filled my tea kettle to the top with water and set it to heat up. I poured the entire contents over the dandelions, then promptly covered the bowl with plastic wrap and left it to steep, and cool off, overnight.


I left my spoon on top to ensure the weight kept the steam from lifting the wrap.


The next day, I strained out the blossom heads! These will go promptly into my garden for compost!


If I were making salve, I would have left the liquid as it was on the right. However, because jelly should have a lighter taste and is prettier when the light shines through it, I put a coffee filter in my colander and strained the liquid a second time through that (you can see the bare edge of the filter in my red colander). The bowl on the left shows the difference - it is much more clear than the original.


I should say that before I even started straining the flower heads, I started heating up my jars and lids. By the time I had the first batch of jelly simmering, the jars and lids were ready to be filled.

Dandelion Jelly

3 cups of dandelion tea
3 cups of sugar
2 Tablespoons of lemon juice
1 teaspoon of vanilla extract
1 package of pectin

Bring the ingredients to a boil and allow a hard boil for at least a minute.
Spoon into the hot jars and loosely tighten the rings around the lids. Leave at least 1/4" of headspace.

Once you have enough for your canner, place back into the pot and bring to a boil. Make sure you have about an inch of water above the tops of the jars.
Boil for 10 minutes.

Remove carefully and let cool on a dry towel. Wait for the staccato, symphonic 'thok' of the lids sealing as the jars cool.


This is my second batch - I didn't get quite as much out of this batch. I think I filled my jars more fully on this one than the first. But, in all, I ended up with 12 jelly jars of dandelion jelly.


Aren't they beautiful? My honeysuckle jelly was, initially, the same color. However, I added rose petals from my rose bush and it turned a lovely shade of red. I think, if I do a second batch, I'll do the same to the dandelion jelly.


So, shortly after finishing the canning process, my son had baseball practice. I left the jars cooling. A few hours later (long first practice of the season!), I came home and found that my jelly was not as thickened as I would like it to be. However, it is delicious (I tasted the spoon after I filled the jars) and it smelled like honey, so I am fairly certain I will still enjoy my dandelion syrup. I may alter the pectin ratio in the future.

Next up, I plan to try to make dandelion cookies. I'll be sure to let you know how those turn out! And, if the spring continues as it has, I should have enough heads to make more salve. I took stock of my batch from last year and am nearly out, so that obviously means it is time for more. I'll document that as I go, too. It really is wonderful.

If you try to make anything dandelion, let me know! I have fallen in love with these happy little flowers - they make me smile as much now as they did when I was a child!