Powered By Blogger
Showing posts with label Baking. Show all posts

Tuesday, April 4, 2017

Dandelion Cookies

Continuing on with my fascination of dandelions (and their light floral scent and taste, plus their incredible health benefits...), my son and I made dandelion cookies this past weekend. If you recall, I attempted to make Dandelion Jelly earlier this spring. But more dandelions have since bloomed, and we have not yet mowed, so dandelions I must use whilst I can. 


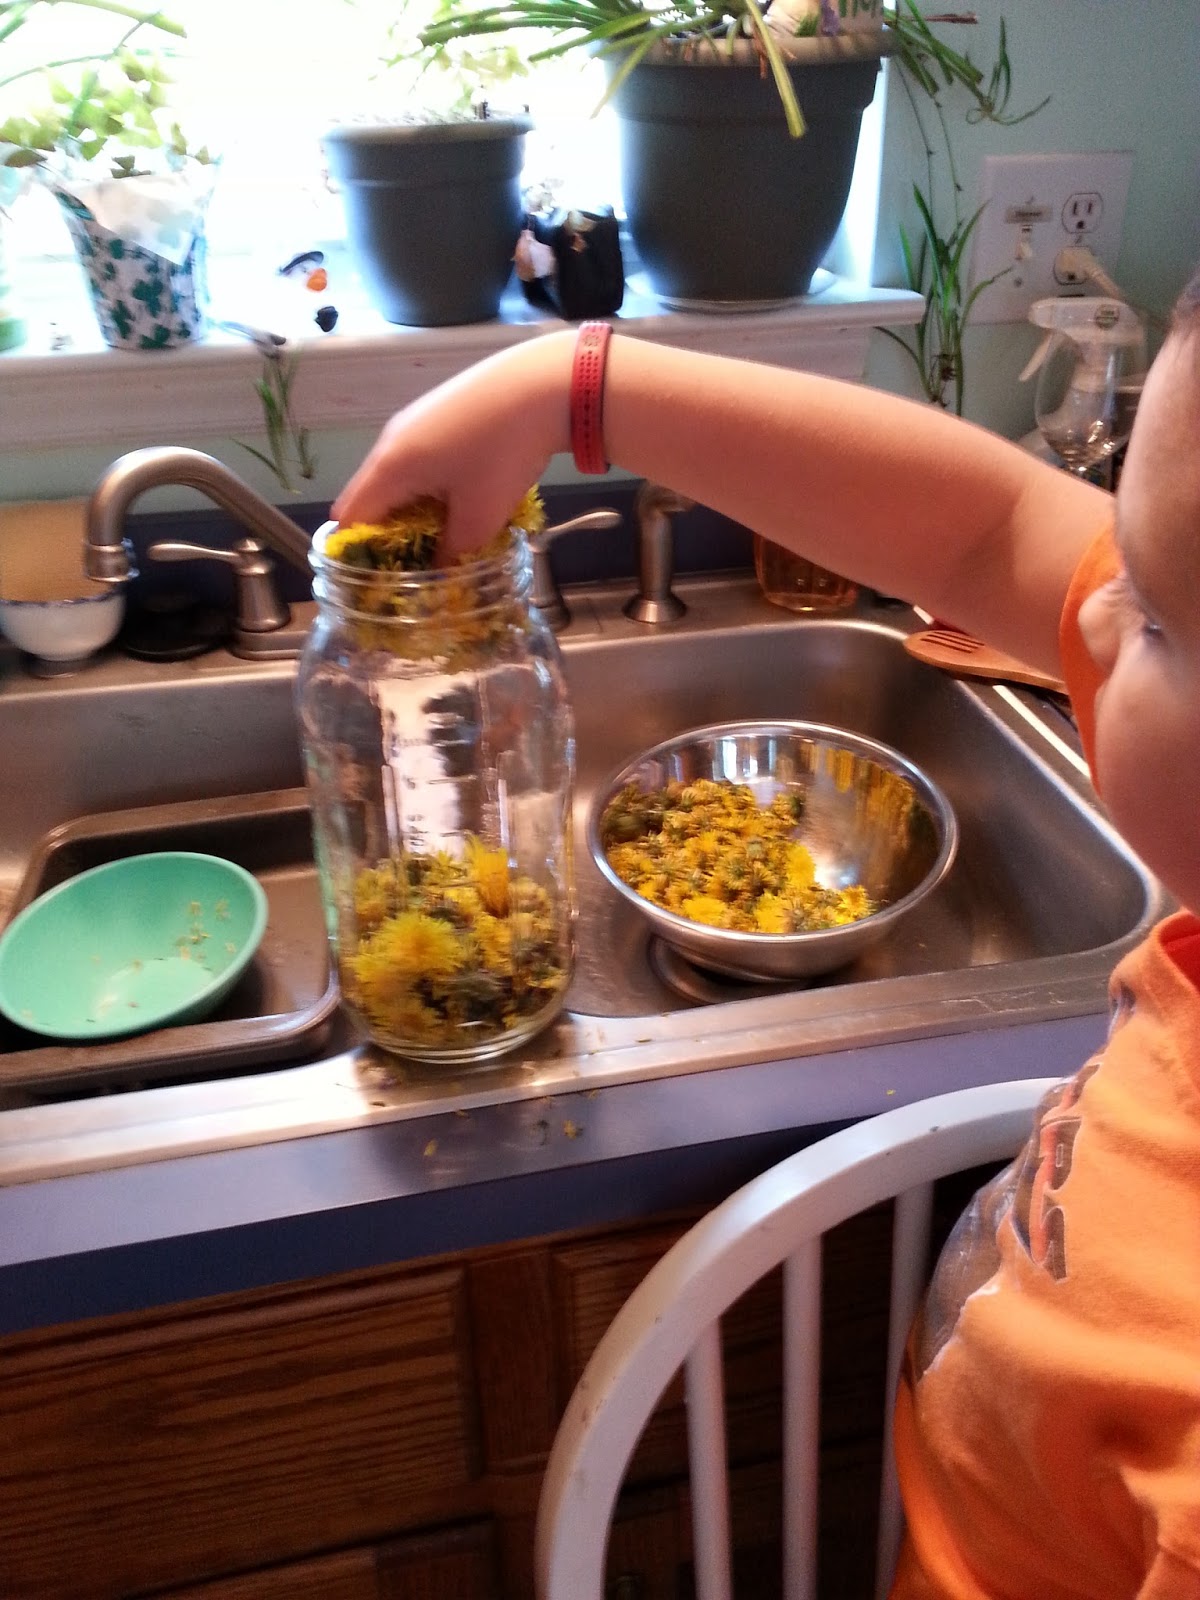
My son begins to prep the bright, open flowers (only use fully ripe blooms from dandelions that have been picked in clean areas - no mowing, no nearby car exhaust, no spraying for weeds, etc.) by snipping the yellow petals and stamens from the bloom heads. You'll need about 1/2 cup of these, which you'd think isn't much, but surprisingly, will not fill as quickly as you'd expect. Thankfully, I had quite the number of perfect dandelions in my yard.


 Save the part you don't use. I collected these to put into a jar for making salve - with the heads I collected that I did not use.

**You can freeze the heads, but be careful of ice crystals and their subsequent added moisture when you thaw them. Depending on what you're making, you will  want to dry them slightly before adding to the recipes.


My son is adding the remaining heads and the shorn heads to a large jar, to which I will add enough good quality olive oil to begin soaking the heads to make my salve.


Add the flower shavings to your batter, mix, and drop in dollops on a parchment paper covered cookie sheet. Bake approximately 15 minutes, allow to cool, and enjoy!


They're so pretty!


Mine spread and ended up more like tuiles than cookies. But that did not diminish their taste. They're lovely. They're light and slightly-floral. And they didn't last.

Dandelion Cookies

1/2 cup coconut oil
1/2 cup honey
1 cup of gluten-free flour
2 eggs
1 Teaspoon vanilla
1 cup of oatmeal
1/2 cup of dandelion flowers

Preheat the oven to 375*.
Whip together the wet ingredients. 
Sift together the dry ingredients. 
Fold into one another. 
Fold in the flower petals. 
Drop by spoonfuls onto a parchment paper covered cookies sheet.
Bake approximately 15 minutes, or until lightly browned, and allow to cool.
Enjoy!

They're healthy, easy, and won't last! Let me know what you think of these!

Thursday, March 5, 2015

Endometriosis Diet - Gluten-Free Spinach Quiche Casserole

I grew up with my mother making a quiche recipe that is very comforting - it was made often enough to reside in my memory and remind me of home, but not so often that it seemed overdone or too common for a weekly meal repertoire. I've made this often over the years for my girlfriends when they come over to talk over a pot of tea, and I've made it to take to school for pot luck lunches. And then I had a child, my endometriosis grew worse, and I wanted to determine a way to made the quiche gluten-free, after learning just how badly gluten affects my health.

In the course of trial-and-error, I can tell you, very easily, that I've found corn noodles to hold up better for hearty meals - spaghetti, a casserole such as this recipe, etc. Use rice noodles for lighter meals - ones that will not be subjected to heating and cooling - pasta salad, etc. The corn pasta needs to cook a little longer to soften more, but be watchful of both corn and rice noodles, as once they soften, they reeealllly soften and can easily become mush.

First things first - set a full package of frozen spinach to thaw. After it is completely thawed (I set it out overnight), I poke holes in the bag and set a heavy pot on it to help squeeze out the extra liquid. Let this drain until you're ready for it.

Here, I cooked 3/4 of a package of corn macaroni. Salt the water very well. I would usually prepare all the other ingredients while these cooked and toss them together as soon as draining the noodles, but my son needed some help and distracted me - it happens! So, I drained these and tossed them in olive oil, which I think actually helped keep them moist as the casserole baked.
I chopped up about 1/2 cup of onion and two cloves of garlic - normally, in other meals, I would prefer to saute the onions and garlic in oil and then toss them with the other ingredients, but I actually really like the extra texture the crunch from the onions brings to the dish.
In order to keep with my endo diet, I used non-dairy cheese. The non-dairy cheese melts just like real cheese - if you're testing which foods affect you, slowly weed out triggers - red meat, gluten, and dairy impact the way I feel the most, so I try to severely limit my intake on those. I do indulge every once in a while, but it has to be negligent quantities or I will feel it much sooner. Here, I used my kitchen shears to cut up already-cooked bacon, the shredded cheese, and the onions and garlic.

I've also added chopped bell peppers, quinoa, sun-dried tomatoes, kalamata olives, etc. The leftovers in your refrigerator are a perfect way to make this yours! Or your imagination...
For a casserole this size, I use at least 6 eggs, but it honestly comes down to your preference for how moist you want your casserole to be. Whisk the eggs with about a cup of milk (I used rice milk, as my son has a nut allergy and I try to stay away from soy).

Add the drained spinach to the eggs and mix well. It is to this mixture that I also added some leftover brown rice. Make sure you salt and pepper the mixture well.
After mixing all the 'dry' ingredients together, and whisking all the wet ones, fold them together and pour over the noodles in a separate, large container. Mix well. Use nonstick spray on your baking dish, and spread the mixture evenly. Sprinkle more non-dairy cheese over the top.
Bake on 325* for about 30 minutes for this size of a pan. Keep an eye on it, though, as you don't want the noodles to dry out.
Doesn't it look delectable? Yum.
I've made this in a slow-cooker, too, so if you're thinking of a pot luck (I did last year just to make sure I had something I could eat at the luncheon), do not worry. Just watch the time and temperature it is cooking so you don't overdo it.

It is healthy. It is filling. And it keeps my blood sugar in check without exacerbating my endometriosis any worse. And I love the fact that I can toss in nearly any vegetables I currently have on hand with it.

Please let me know if you try this! I want to know how you liked it.

Gluten-Free Spinach Quiche Casserole

3/4 of a pound of corn noodles.
6 eggs
1 cup of milk (unsweetened soy, rice, cow's, or nut)
1 pound frozen spinach (thawed and drained)
2 cups of shredded cheese
1 package of already-cooked thick-cut bacon
1/2 a large onion
2 cloves of garlic
salt and pepper to taste

1. Cook the noodles (salt well) and drain
2. Whisk the eggs and milk together
3. Mix in the thawed and drained spinach (and any other vegetables you prefer)
4. Chop up the onion and garlic
5. Toss with 2 cups of cheese and chopped up package of bacon
6. Toss the 'dry' ingredients with the noodles in a large bowl
7. Add in the egg mixture and mix it all thoroughly
8. Use nonstick spray on your casserole dish
9. Spread the casserole mixture well, making the edges slightly thicker than the middle so it cooks evenly.
10. Bake at *325 for about 25-30 minutes.

Enjoy!


Tuesday, February 17, 2015

A Return to Blogging, More Snow & Memories, And a King Cake Surprise

My goodness - I am rather embarrassed by the length of the break I took. It was, by no means, deliberate. I've been trying to handle a bit more this year and, though I've had quite a few posts that began in my head, they never quite made it to fruition on here. Please forgive me.

So, it was a year ago that we had our most recent snow day. A year ago on Valentine's that Syd and I baked a homemade heart shaped cake (one square and one round pan) and whipped up homemade buttercream frosting, dyed pink, for Daddy when he got home. A year ago that my then 4 year old discovered the joy that comes with playing in the clean snow, building forts, climbing piles and drifts, and throwing snowballs at Mommy as she shoveled.

And now, it is Fat Tuesday after Valentine weekend and we're home again, two days in a row (after shoveling, I am thinking it will be 3 - our roads still haven't been touched), thankful for Daddy and hoping he makes it home safely. He wasn't able to get the jeep this time, so I again went out to shovel as much of the driveway and street as possible so he could get in this evening. The biggest difference is that Syd has been ill with some weird virus - so, though I'm in better shape than I was last year, I'm a bit more worn out.

Regardless, a load of bed sheets and towels are now clean. And dishes are done. And shoveling is halfway finished. If we have another day off tomorrow, it will be completed then. It took me 2 days last year, too. And hopefully, one more day home will fully remedy Syd before we have to worry about school again.

So, what do you bake when the weather is/was nasty? Cookies? Brownies? We wanted something different, and since we've been home with a sick child and didn't make it to the grocery store this weekend, it needed to be something I could make with what I had. Enter, King Cake! It is, after all, Fat Tuesday! I found this recipe, which seemed easy enough. Aside from what the title says, though, it was not 'quick.'

Here, Syd is helping Mommy mix the dough. He's adding the eggs.

One of my favorite memories as a child was helping my mother knead the dough to her homemade wheat bread. Oh - so soft and warm. And I would always sneak a tiny piece. She let me have a tiny ball all to myself to knead, eat, bake - do with as I saw fit. I want Syd to have those feelings as he grows. and I want him to know some basics to cooking. Here, he's experiencing kneading for the first time. He loved getting flour everywhere and dusting off his hands like a master chef!
 My first attempt at a braid - I undid this, stretched the pieces out longer and tried to make a tighter braid. See below...
Leftover from Syd's Star Wars birthday (TRULY ashamed I didn't post any of those! I may do so retroactively...) I used blue edible glitter to help spruce up the King Cake - I don't know that I have enough powdered sugar to make the frosting, so I thought this would help. Here, the dough is rising for a second time.
Aaaand - baked. Now cooling on a rack. I can't wait to hide a little Lego guy inside and frost it, adding more sprinkles. I hope Steve is pleasantly surprised, and I hope he understands the true sentiments behind our little endeavor.
I put a movie on before heading out to shovel. I came in about an hour later and found this. Poor little guy. But, several hours later, he seems to be feeling much better, so let's hope that was the trick!
What have you gotten up to on your days off, if you were happily surprised by this storm (which was quite far reaching!)? How did you fill your days, or relax, or surprise family? Share below!

I hope you all stay safe and happy and warm as our Polar Vortex of 2015 continues. Happy Shoveling and Baking!

Friday, February 14, 2014

Reminiscing while Juggling Tasks - Making My Love Known

We've been hit with the 3rd largest snow storm in my town's recorded history. It isn't THAT much, in terms of what I've seen as a child growing up w/ lake-effect snow from Lake Michigan in Waukesha, Wisconsin, but it is enough, what with our hills, curvy roads, and mountain passes, to side-line everything in the surrounding area for a few days.

That being said, today is Valentine's Day, and while I did have something special and unique planned for Steve (we don't usually celebrate this as a special day, since I'm thankfully conscientious of how important he is to me), the weather has side-lined it. It may end up being a birthday surprise this summer when there is no chance of a blizzard ruining it. :-)

Instead, though, I did what I felt was next best - and what I strive to do on a daily basis - I wanted to demonstrate to him, and to my son, what true love looks like. Steve had to go to work. He purposely drove a work jeep home so he could get in and out over the past two days, swinging by to pick up his employees, coming home an hour or more late due to impassable roads, etc. So, what could I possibly do to make his life easier once he got home from making sure the entire valley had water? That his employees were safe?

Yes, a hot dinner on the table is essential. But so is a driveway that is maneuverable, a happy child waiting to play with him, work clothes cleaned, folded, put away. I am happy to take care of my family when they do so much to take care of me. And Steve is such a kind soul - such a good Daddy - such an uplifting friend and confidante and positive influence in both our lives. He is worth the sore back I will have the next few days.

So, I bundled the kiddo up and we went outside to play. I cleared out enough for his car to come home and dug my car out so today's sunshine would make short shrift of the thaw. Syd loved the huge pile I made near the mailbox, and climbed to the top over and over, yelling in glee as he crested.
Then, no snow day is complete without the signature snowman. I have a kit that my wonderful sister gave us for Christmas several years ago, but I hadn't fully expected Syd to last this long in the snow (the past few days, we've lasted 30 minutes, tops). He proved me wrong and we built this guy, using gravel and mulch for the face.

My thoughts drifted back to my childhood, after we moved to Virginia. There was a huge snowstorm when I was in high school, and when I think of it, I automatically remember my entire family getting so excited because we'd missed our Waukesha snow so much. My mother couldn't make it into work, so she was home with all of us. We made a HUGE snowman in the driveway - at least 6 feet tall (if you know the women in my family, that is huge!). My mom went inside, gathered together several water bottles, and filled them with water and food coloring, and we completely decorated our snowman, giving her a dress, a face, hair, etc. I know we have pictures somewhere, but I will have to really dig to find them.

My point is, in building our snowman below, and the subsequent activities, I thought very fondly of the time Mom and I spent together outside, forgetting chores and roles and just playing. I truly hope that Syd grows up to have fond memories like these of the two of us, especially since we'll be sharing all snow days together.
After the snow man, Syd and I rested in the seemingly warm snow. The temperatures have risen to the high 40s, and it was downright pleasant to lay in the snow, staring up at the cerulean blue sky with nary a cloud nearby. I was struck by this picture, and I wish you could truly see just how beautiful it was with the sparkles from the snow reflecting off his skin.
He got tired of laying and started throwing snowballs at me. So, I did what any good Mommy would do and began to wrestle with him. Here, he is struggling to stand back up.
He continued to throw snowballs, so I talked him into building a snow fort so we could attack Daddy when he got home. This shows how tall it is! We'll both be able to successfully duck down and block any snowballs coming our way.
I built a fort for Daddy, too. After I finished, Syd wanted to test them out, so we had a snowball fight. Here's a solid launch he let fly. Suitably, it looks like it is in the shape of a heart! After a long day fighting snow, keeping us in water, and just being out and about, I know a snowball fight with our new forts will help Daddy forget his stress and kick off his weekend perfectly.
After we came inside, I got laundry going so we would have dry clothes to get into for our next trip into the white wonderland outside. Then, we baked a cake. One square pan and one circle pan. Cut the circle in half and attach with frosting to perpendicular angles of the square to form a heart. Syd loves to bake with Mommy, and Daddy will still have something special waiting for him at home.

How do you show your love in simple ways? How do you pass the time when the weather is bad? Share your ideas and perhaps we'll try yours next snowstorm!

Happy Valentine's Day to everyone - and Happy Memories with the simple things in life.

Sunday, December 1, 2013

Pumpkin Pie Surprise - Waste Not, Want Not

I have a 4 year old. The result of having a small child is that there are often temperamental changes of mind on anything - clothing, activities, and most especially, food. Sydney accompanied me on our most recent grocery trip. He saw a box of chocolate graham crackers and promised promised promised he would love them and eat them and be a good boy.

He didn't like them.

Confession: I didn't like them when I tried them, exasperated that he wouldn't eat them.

But I refuse to let decent food go to waste.

So, I made miniature Pumpkin Pies out of them. I used a muffin tin so I could freeze them and eat them more slowly.

Pumpkin Pie Surprise

  1. The first thing I did was crush up all 3 sleeves of grahams in a gallon-sized freezer bag. Sydney had a lot of fun helping Mommy punch the baggie to break up the crackers. I added a few teaspoons of cinnamon after the pieces were fairly small, just for fun and a little kick.
  2. Spray a 6 & 12 tin muffin tin with olive oil. You could probably use just the 12 but the cups would be very full.
  3. I melted a stick of butter, poured it into the baggie, and smooshed everything until it was fairly well-mixed.
  4. Add a spoonful of the crumbs to each tin and tamp it down.

5. I beat 2 eggs really well and added 1/2 teaspoon of ground cloves, 1 teaspoon of cinnamon, about 1/2 teaspoon of freshly ground nutmeg (the selling point! Smells so delectable!)
6. Beat in about 1/2 cup of heavy whipping cream and add 1/2 teaspoon of salt. Beat in a 30 oz can of pumpkin pie filling (I usually buy just canned pumpkin, but had grabbed this one by mistake).
7. Fill each cup to about 3/4 full and bake on 350* for about 20 minutes, or until the cups are firm in the center.Allow them to cool in the cups, then remove. 
8. Store in a container in the fridge, or freeze individually.

These were delicious! I know there are many variations of pie out there, but the chocolate crumb crust added a nice touch. Please let me know if you try this or something like it! I hope you enjoy!

Saturday, October 26, 2013

Roasted Pumpkin Seeds

Low and slow, baby.  Low and slow.

That's the only way to succeed with one of my seasonal favorites.

I love pumpkin. I am a fiend for pumpkin. Anything and everything pumpkin. I am thankful that pumpkin is canned and I stock up during the fall. Most of my baking surrounds itself, it seems, around pumpkin - year round.

But one seasonal staple that remains seasonal is my roasted pumpkin seeds. They are healthy, delicious, and so easy to just chomp on, husk and all.

I even offer to roast any seeds my students bring in, then share them with the entire class.

Roasted Pumpkin Seeds
First, it is important to note that you need a lot of time at home to do this properly. If you've only got two hours before you have to leave for work or to go to a meeting, follow step one then stop until you have more time. Make sure you store them in the fridge, covered.

  1. After you cut the top off the pumpkin, use your fingers as a sieve to scoop out the seeds. This will help tremendously in separating the 'guts' (pith?) from the seeds. I usually drop my seeds into a bowl of heavily salted water to soak and wash off the pumpkin. 
  2. Preheat the oven to around 250*. I sometimes go lower, but never - NEVER go higher.
  3. Using either your hand or a strainer of some sort, scoop the seeds out of the salted water onto a large rag or towel. If there are clumps of pumpkin still stuck to the seeds, separate. It certainly won't hurt to roast that as well, but the flesh turns rather dark and tough and can be a turn-off to first time seed tasters.
  4. I tend to fold the towel over and do a quick rub, just to soak up any excess moisture.
  5. Folding the towel in half, I create a 'spout' and pour the seeds onto a lipped sheet pan. You may have to scrape some that stick to the towel.
  6. Liberally pour olive oil onto the seeds. Toss gently to coat. 
  7. Sprinkle sea salt onto the seeds. 
  8. Sprinkle garlic powder onto the seeds (no need for garlic salt. We're not going for a heart attack, here)
  9. Toss the seeds gently, then sprinkle again.
  10. Pop the pan into the oven.
I let them bake for an hour before I toss them again. Subsequently, toss them every 30 minutes. As the seeds begin to dry, they will stick to each other. Re-sprinkle with salt and garlic each time you toss them while they're still damp.

When the seeds sound like coins (they tend to clatter a bit after they've dried fully), toss them one more time and turn the oven off. Leave them in the oven overnight.

By the next morning, you have a healthy snack! My students ask if they're supposed to eat them whole or crack them like sunflower seeds. Eat them whole. They're so yummy!!

I've also tried this with cinnamon and sugar - these are just as yummy but the sugar can sometimes caramelize a bit, causing an almost 'bark-like' consistency. I would merely suggest that you toss them more frequently than every 30 minutes if you're going for a sweet treat.


Saturday, August 31, 2013

Oatmeal Cut-Out Cookies - Dinosaurs and #4s

Syd's 4th birthday is just around the corner, and I have a quite a bit of fun experimenting on cheap but fun ways to make it entertaining. You can see many of the activities I did over the summer and am planning for his birthday on my Pinterest board here. But the most recent addition to the 'dance of experimentation' was the Oatmeal (a.k.a., healthier than store-bought) Cut-Out Cookies.

The first time I made these, Syd was about 18 months old, and none of us liked them, much. I honestly do not recall where I found the recipe. It was handwritten in his book, so I'm going to assume I copied it hastily out of a magazine. Regardless, they were rather flavorless. However, they did cut out well. That's a bonus, right?

Since Syd's birthday theme is dinosaurs, I thought it would be wonderful to have a simple cookie to go along with his festivities. Bonus - after tweaking the recipe, he wolfed them down, so I think I may have a winner. I was tempted to purchase a dinosaur cutter, but then realized I had his sandwich cutter that made 2 dinosaurs out of his grilled cheese. Problem solved! I did, however, buy a #4 cutter to accompany his brachiosaurus cookies.

Oatmeal Cut-Out Cookies

Preheat the oven to 375* (I think this is a little hot; I went to 350*)
1 cup unsalted butter - (I usually let mine sit out, but I've also found that 15 seconds in the microwave on half-power does the trick nicely.)
1 1/2 cups sugar

Blend these together well until fluffy.

Whisk the dry ingredients together while this blends:

3 cups all-purpose flour
1 tsp salt (I used more - probably 1 1/4 tsp - and I used a coarser salt than the regular table salt - it added a subtle but nice surprise every once in awhile as you bit into the cookies that blended well with the sweetness.)
1 tsp baking soda
1/4 tsp baking powder
Cinnamon - (I'm a nut for cinnamon, so I don't measure. I dump some in and after I've whisked the dry ingredients together, I smell them. If I can't smell cinnamon, I add more. Simple enough. You need to measure to your own taste.)

After the butter is fluffy and the dry ingredients are whisked well:

2 eggs - beat these into the sugar mixture well, one at a time, incorporating each egg well.
1 Tbsp vanilla - (I love vanilla, too - I used vanilla paste instead of extract. Yes, that says Tablespoon - think about all the absorbing ingredients - flour and oatmeal? It needs the extra punch.)

Slowly add the dry ingredients to the wet, mixing well. Afterwards, add in 2 cups of dry oatmeal, folding this in by hand.

Roll the dough to 1/4" and cut-out. Spread on prepared (greased - blech - I used parchment paper) pans. Bake at 350-375* for around 10 minutes or until lightly brown.
These were test cookies - I plan to add icing to the top for Syd's birthday so the 4 looks like a 4. And this is the only dinosaur that survived, so it looks a little sad, but the sandwich cutter worked very well. Either way, these are yummy! I hope you enjoy!

Sunday, May 19, 2013

Pumpkin Scones Update

Ah... pumpkin. It is good any time of year. I refuse to designate pumpkin as a 'seasonal' item. Case in point, I had the baking itch again today and decided to try the recipe for Pumpkin Scones I'd been guarding for - I hesitate to admit this - years without trying. 

I'll repeat the recipe so you don't have to go to my other page:

Pumpkin Scones - Makes about 12
4 1/2 cups all purpose flour
1 cup plus 2 Tbsp granulated sugar
3/4 cup plus 1 1/3 tsp light brown sugar
1 Tbsp baking powder
1 Tbsp salt
1 Tbsp cinnamon
1 Tbsp nutmeg
(Already I can see I would add the same measurement in cloves.)
1/2 cup pumpkin puree (That's it?)
1 3/4 cups heavy cream
1. Combine all dry ingredients in a mixer w/ a paddle and blend well. Add pumpkin and mix until combined. Add the cream and do the same.
2. The dough will be sticky, so roll it in about 1/2 cup flour. Line a half-sheet pan w/ parchment paper and roll out the dough into a 1" thick rectangle. 
3. Cut it into 4x4" squares (you should get 5 or 6) and place them on a fresh parchment-lined sheet pan. Place the entire pan in the freezer until the scones have frozen thoroughly.

3. Cut each square into two triangles. (Any scones you do not want to immediately bake may now be wrapped up and remain frozen until later use.)
4. Bake, about 4 at a time, on a parchment-lined sheet pan at 350 degrees for 20-25 minutes, or until golden brown.
5. Cool the scones on the pans for a few minutes, then transfer to a wire rack to cool completely.
6. Drizzle w/ cream cheese icing and enjoy.
This was printed in a newspaper and states this is courtesy of Robert Carkin. 

Confession time: I misjudged how much heavy cream I had. I only had 1 cup left in my carton. I did, however, have full-fat buttermilk from our weekly batch of pancakes that I make for Syd. I figured the important part was the fat, since there is no oil or butter in these, and used that. 

It was delicious! I am quite bitter that I hadn't tried them before. They will, however, become a regular part of my baking repertoire. 
The best part? I had just enough pumpkin left over to make my famous pumpkin bread!! One loaf will automatically go into the freezer for sometime this summer when it is much too hot to bake. The other will be devoured immediately. Yay for pumpkin!

Friday, May 10, 2013

Pumpkin Scones

My coworkers know I am a "Yes Man" for anything pumpkin. I love pumpkin in sweet, in savory, in any dish. And it is truly good for you, so why not? I have found ways to incorporate pumpkin into the oddest dishes, sometimes without anyone even noticing (lasagna). And at times, I'll throw in a last little scoop I have into something just to keep from wasting it.

My only real regret - I haven't figured out a way to successfully make pumpkin biscotti - they're much too moist. They're delicious, but they don't have the shelf-life of true biscotti. Thank goodness I don't give up easily.

In response to a request from a friend about possibilities for Mother's Day, I immediately thought of my pumpkin recipes because everyone obviously loves pumpkin as much as I do. One of my absolute favorites (and it is much easier than the stigma attached to it) is Pumpkin Creme Brulee - I posted this recipe a few years ago for my sister. I then remembered I have this recipe for scones. I actually haven't tried these yet, so if anyone beats me to them, let me know.

Pumpkin Scones - Makes about 12
4 1/2 cups all purpose flour
1 cup plus 2 Tbsp granulated sugar
3/4 cup plus 1 1/3 tsp light brown sugar
1 Tbsp baking powder
1 Tbsp salt
1 Tbsp cinnamon
1 Tbsp nutmeg
(Already I can see I would add the same measurement in cloves.)
1/2 cup pumpkin puree (That's it?)
1 3/4 cups heavy cream

1. Combine all dry ingredients in a mixer w/ a paddle and blend well. Add pumpkin and mix until combined. Add the cream and do the same.
2. The dough will be sticky, so roll it in about 1/2 cup flour. Line a half-sheet pan w/ parchment paper and roll out the dough into a 1" thick rectangle. Cut it into 4x4" squares (you should get 5 or 6) and place them on a fresh parchment-lined sheet pan. Place the entire pan in the freezer until the scones have frozen thoroughly.
3. Cut each square into two triangles. (Any scones you do not want to immediately bake may now be wrapped up and remain frozen until later use.)
4. Bake, about 4 at a time, on a parchment-lined sheet pan at 350 degrees for 20-25 minutes, or until golden brown.
5. Cool the scones on the pans for a few minutes, then transfer to a wire rack to cool completely.
6. Drizzle w/ cream cheese icing and enjoy.

This was printed in a newspaper and states this is courtesy of Robert Carkin. I am truly curious to see how these turn out, though I imagine they would be divine w/ some fresh coffee.

Bon appetit!

Saturday, February 2, 2013

I'm Pretty Sneaky - Black Bean Brownies


What can I say?

I've begun to earn the reputation at school of always adding some vegetable or another to baked goods. Zucchini bread; carrots to applesauce cake, etc. Well, this time, I made Black Bean Brownies!!

Let's be honest - who doesn't get so caught up on balancing life, work, family, chores that we make mistakes w/ our diet - or providing for our families in that arena. This way, you don't have to worry or feel guilty about missing some component. Making these this evening also followed on the tail end of a trying virus that had Syd eating almost nothing, so getting protein and roughage in him while he ate chocolate is worth it all!

The best part? My boys like them!!

1/2 can (of 16 oz cans) of black beans, rinsed and drained
3 eggs
4 Tbsp flour
3/4 cup sugar
1/4 cup cocoa powder
pinch of salt
3 Tbsp oil
vanilla
nuts - which I woefully left out - but here's hoping Syd continues to outgrow his allergy!

Blend it all (except the nuts) in a food processor and pour into a greased baking pan. Bake at 350 for approximately 30 minutes. The top should be set and the edges should be starting to pull away from the sides of the dish.

Happy Veggie Baking! Let me know how your recipes turn out!