Powered By Blogger
Showing posts with label Dessert. Show all posts

Tuesday, April 4, 2017

Dandelion Cookies

Continuing on with my fascination of dandelions (and their light floral scent and taste, plus their incredible health benefits...), my son and I made dandelion cookies this past weekend. If you recall, I attempted to make Dandelion Jelly earlier this spring. But more dandelions have since bloomed, and we have not yet mowed, so dandelions I must use whilst I can. 


My son begins to prep the bright, open flowers (only use fully ripe blooms from dandelions that have been picked in clean areas - no mowing, no nearby car exhaust, no spraying for weeds, etc.) by snipping the yellow petals and stamens from the bloom heads. You'll need about 1/2 cup of these, which you'd think isn't much, but surprisingly, will not fill as quickly as you'd expect. Thankfully, I had quite the number of perfect dandelions in my yard.


 Save the part you don't use. I collected these to put into a jar for making salve - with the heads I collected that I did not use.

**You can freeze the heads, but be careful of ice crystals and their subsequent added moisture when you thaw them. Depending on what you're making, you will  want to dry them slightly before adding to the recipes.
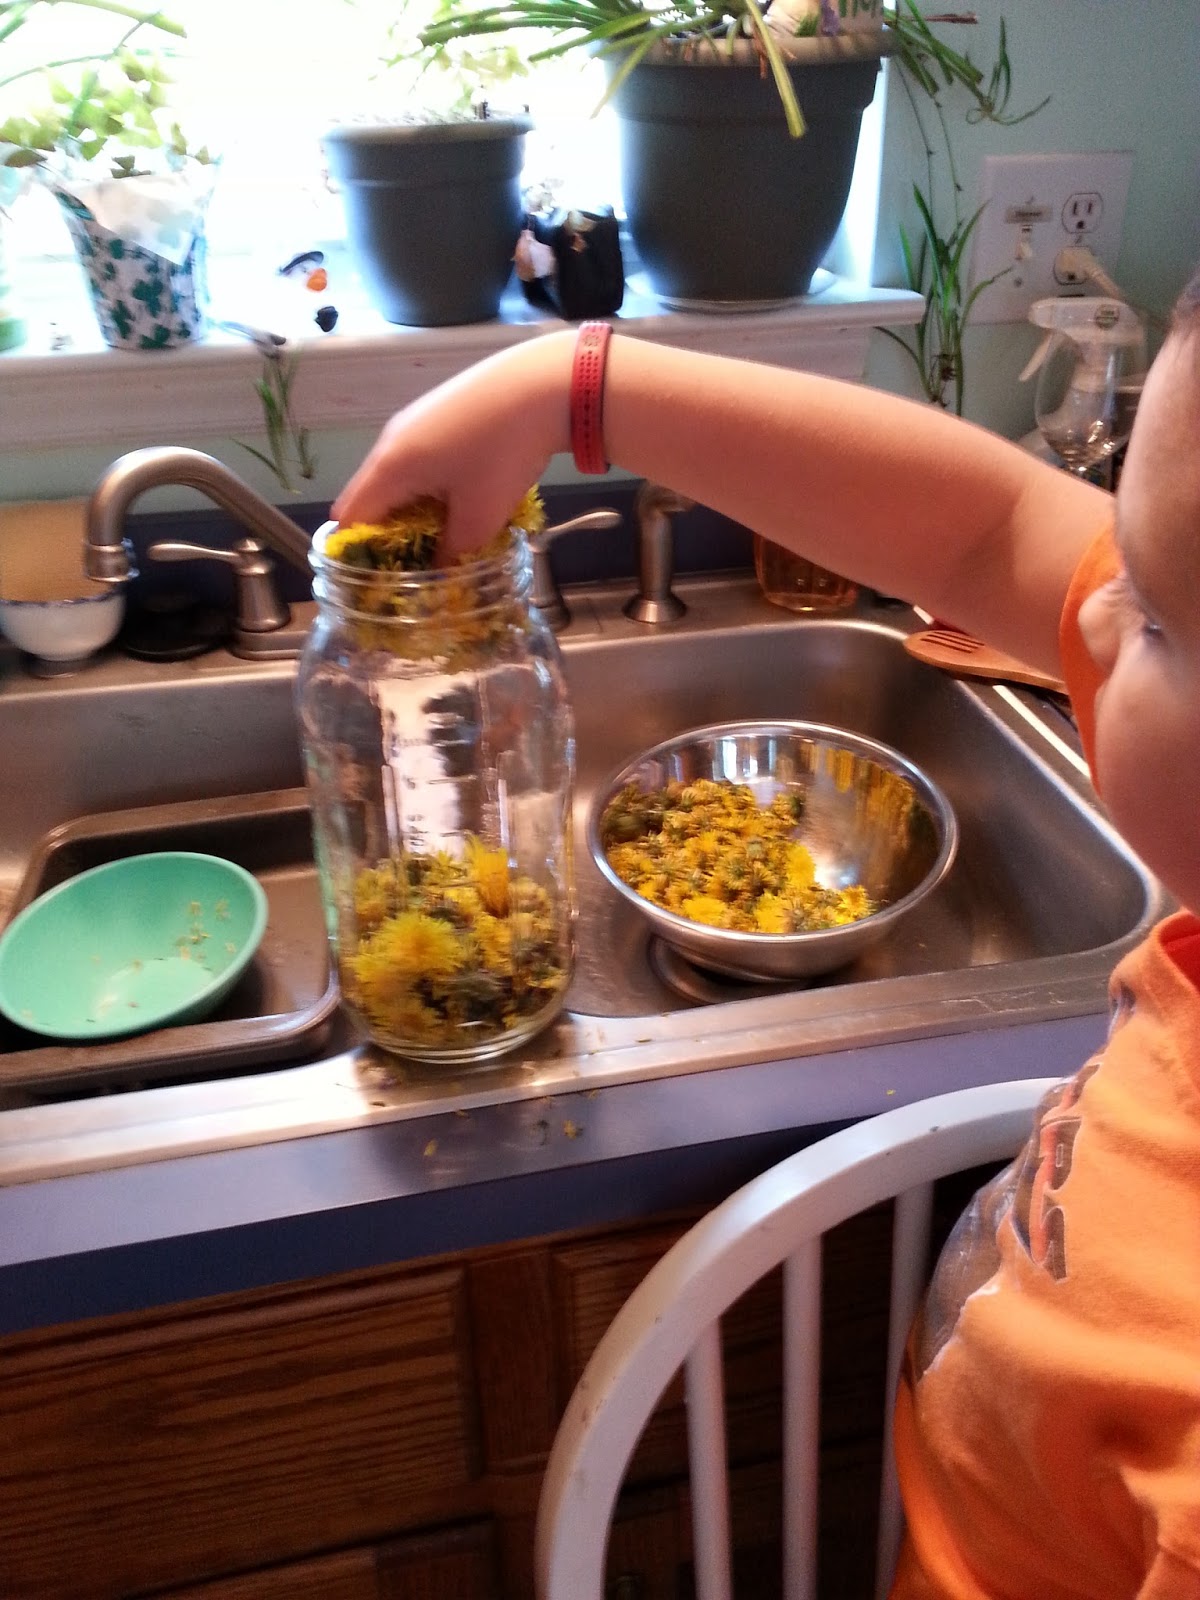

My son is adding the remaining heads and the shorn heads to a large jar, to which I will add enough good quality olive oil to begin soaking the heads to make my salve.


Add the flower shavings to your batter, mix, and drop in dollops on a parchment paper covered cookie sheet. Bake approximately 15 minutes, allow to cool, and enjoy!


They're so pretty!


Mine spread and ended up more like tuiles than cookies. But that did not diminish their taste. They're lovely. They're light and slightly-floral. And they didn't last.

Dandelion Cookies

1/2 cup coconut oil
1/2 cup honey
1 cup of gluten-free flour
2 eggs
1 Teaspoon vanilla
1 cup of oatmeal
1/2 cup of dandelion flowers

Preheat the oven to 375*.
Whip together the wet ingredients. 
Sift together the dry ingredients. 
Fold into one another. 
Fold in the flower petals. 
Drop by spoonfuls onto a parchment paper covered cookies sheet.
Bake approximately 15 minutes, or until lightly browned, and allow to cool.
Enjoy!

They're healthy, easy, and won't last! Let me know what you think of these!

Tuesday, February 17, 2015

A Return to Blogging, More Snow & Memories, And a King Cake Surprise

My goodness - I am rather embarrassed by the length of the break I took. It was, by no means, deliberate. I've been trying to handle a bit more this year and, though I've had quite a few posts that began in my head, they never quite made it to fruition on here. Please forgive me.

So, it was a year ago that we had our most recent snow day. A year ago on Valentine's that Syd and I baked a homemade heart shaped cake (one square and one round pan) and whipped up homemade buttercream frosting, dyed pink, for Daddy when he got home. A year ago that my then 4 year old discovered the joy that comes with playing in the clean snow, building forts, climbing piles and drifts, and throwing snowballs at Mommy as she shoveled.

And now, it is Fat Tuesday after Valentine weekend and we're home again, two days in a row (after shoveling, I am thinking it will be 3 - our roads still haven't been touched), thankful for Daddy and hoping he makes it home safely. He wasn't able to get the jeep this time, so I again went out to shovel as much of the driveway and street as possible so he could get in this evening. The biggest difference is that Syd has been ill with some weird virus - so, though I'm in better shape than I was last year, I'm a bit more worn out.

Regardless, a load of bed sheets and towels are now clean. And dishes are done. And shoveling is halfway finished. If we have another day off tomorrow, it will be completed then. It took me 2 days last year, too. And hopefully, one more day home will fully remedy Syd before we have to worry about school again.

So, what do you bake when the weather is/was nasty? Cookies? Brownies? We wanted something different, and since we've been home with a sick child and didn't make it to the grocery store this weekend, it needed to be something I could make with what I had. Enter, King Cake! It is, after all, Fat Tuesday! I found this recipe, which seemed easy enough. Aside from what the title says, though, it was not 'quick.'

Here, Syd is helping Mommy mix the dough. He's adding the eggs.

One of my favorite memories as a child was helping my mother knead the dough to her homemade wheat bread. Oh - so soft and warm. And I would always sneak a tiny piece. She let me have a tiny ball all to myself to knead, eat, bake - do with as I saw fit. I want Syd to have those feelings as he grows. and I want him to know some basics to cooking. Here, he's experiencing kneading for the first time. He loved getting flour everywhere and dusting off his hands like a master chef!
 My first attempt at a braid - I undid this, stretched the pieces out longer and tried to make a tighter braid. See below...
Leftover from Syd's Star Wars birthday (TRULY ashamed I didn't post any of those! I may do so retroactively...) I used blue edible glitter to help spruce up the King Cake - I don't know that I have enough powdered sugar to make the frosting, so I thought this would help. Here, the dough is rising for a second time.
Aaaand - baked. Now cooling on a rack. I can't wait to hide a little Lego guy inside and frost it, adding more sprinkles. I hope Steve is pleasantly surprised, and I hope he understands the true sentiments behind our little endeavor.
I put a movie on before heading out to shovel. I came in about an hour later and found this. Poor little guy. But, several hours later, he seems to be feeling much better, so let's hope that was the trick!
What have you gotten up to on your days off, if you were happily surprised by this storm (which was quite far reaching!)? How did you fill your days, or relax, or surprise family? Share below!

I hope you all stay safe and happy and warm as our Polar Vortex of 2015 continues. Happy Shoveling and Baking!

Friday, December 27, 2013

Rice Crispy "Coal" Snacks

My son is 4. And as much as we try to teach him the true meaning behind the holidays, and assert what we find to be most important, there is still plenty of room for fun not only as a family, but also because...well, he's 4. What a fun age for nearly every endeavor! 

That being said, I found a version of this recipe online and tweaked it (of course) and fell in love with it. It is really quite simple and the results are hilarious as well as delicious.

Rice Crispy "Coal" Treats

Begin with your standard recipe for rice cereal treats:

  • 6 cups of mini-marshmallows
  • 3 Tbsp butter
  • 1 tsp vanilla
  • 1 tsp cinnamon
  • 2 Tbsp black food coloring
  • 5 cups rice cereal
  • Approx 6 mega-stuff Oreos, crushed (around 1 cup)
-Melt the butter in a large pot. When it is melted, add the vanilla, cinnamon, and food coloring. 
-Swirl the combination until the food coloring has melted throughout the butter.
-Add the marshmallows and turn down the heat - allow to melt into the butter folding regularly.

-While the marshmallows take their dirty bath, crush the Oreos as much as possible (the mega-stuff prevents this somewhat) and mix into the rice cereal.
-Keep stirring the marshmallow mixture. I tried to squish the remaining lumps to help them melt faster. Try to ensure that the black is spread throughout the mixture.
-Toss everything together while the marshmallows are still warm. Be sure to fold gently. Spread parchment paper on your pan and drop by spoonfuls onto the pan so they look more like coal. Place in the refrigerator (or outside, depending on where you live!) until hardened.
-Eat and enjoy! They were truly yummy - the extra cream filling adds an interesting flavor to the standard crispy treat, enhancing the vanilla and subtly sweeter. And the cinnamon adds just a hint of spice that warms you on the cold nights.
Fair warning, though - the black food coloring does have its repercussions. We had a LOT of fun determining who was affected the most. No worries, though - as the night progressed and we continued to munch on chips, cookies, etc., the color wore off. I did look a little Goth for awhile with dark lips, though.

Fun times - especially if you can keep the black mouths a secret until everyone looks around and realizes what happened! I hope you enjoy and have someone "deserving" of coal!

Monday, December 2, 2013

Roasted Apple Crisp - Waste Not, Want Not

How often have you remembered you've some sad, lonely fruit or vegetable sitting around? I was yearning something sweet, and I knew I shouldn't let these sit any longer, so I decided to make my own version of quick Roasted Apple Crisp - with the crisp inside the apples!

Roasted Apple Crisp

  • Start with thoroughly cleaning the apples. I love this organic Veggie Wash - it just helps me feel I'm doing something good for my family, especially when we're unable to always obtain organic vegetables or fruits.


  •  Using a melon baller, scoop out the core. Make sure you leave part of the bottom intact so the juices and butter don't all escape. :-)


  • I mixed about a tablespoon of butter with 1/4 oatmeal, a tablespoon of brown sugar, and 1/2 teaspoon of ground cloves and cinnamon as well as a dash of salt. Mix the stuffing until it is crumbly.
  • Spoon the mixture into the apple cavities and place the tray in the toaster oven/oven. I used our toaster oven and set the temperature to around 375*. I would say the apples took about 20 minutes to roast.
They were so yummy! What a perfect way to curl up and read a book - with a cute little apple crisp topped with a dollop of whipped cream. I can see myself doing this on the nights that Steve and I curl up with our hot cocoa and just enjoy the tree lights and fireplace. The only thing missing is a gentle snowfall outside our windows.

What do you have lying around you'd like to repurpose? What methods do you use for cleaning out the cupboards and the fridge?


    Sunday, December 1, 2013

    Pumpkin Pie Surprise - Waste Not, Want Not

    I have a 4 year old. The result of having a small child is that there are often temperamental changes of mind on anything - clothing, activities, and most especially, food. Sydney accompanied me on our most recent grocery trip. He saw a box of chocolate graham crackers and promised promised promised he would love them and eat them and be a good boy.

    He didn't like them.

    Confession: I didn't like them when I tried them, exasperated that he wouldn't eat them.

    But I refuse to let decent food go to waste.

    So, I made miniature Pumpkin Pies out of them. I used a muffin tin so I could freeze them and eat them more slowly.

    Pumpkin Pie Surprise

    1. The first thing I did was crush up all 3 sleeves of grahams in a gallon-sized freezer bag. Sydney had a lot of fun helping Mommy punch the baggie to break up the crackers. I added a few teaspoons of cinnamon after the pieces were fairly small, just for fun and a little kick.
    2. Spray a 6 & 12 tin muffin tin with olive oil. You could probably use just the 12 but the cups would be very full.
    3. I melted a stick of butter, poured it into the baggie, and smooshed everything until it was fairly well-mixed.
    4. Add a spoonful of the crumbs to each tin and tamp it down.

    5. I beat 2 eggs really well and added 1/2 teaspoon of ground cloves, 1 teaspoon of cinnamon, about 1/2 teaspoon of freshly ground nutmeg (the selling point! Smells so delectable!)
    6. Beat in about 1/2 cup of heavy whipping cream and add 1/2 teaspoon of salt. Beat in a 30 oz can of pumpkin pie filling (I usually buy just canned pumpkin, but had grabbed this one by mistake).
    7. Fill each cup to about 3/4 full and bake on 350* for about 20 minutes, or until the cups are firm in the center.Allow them to cool in the cups, then remove. 
    8. Store in a container in the fridge, or freeze individually.

    These were delicious! I know there are many variations of pie out there, but the chocolate crumb crust added a nice touch. Please let me know if you try this or something like it! I hope you enjoy!

    Saturday, August 31, 2013

    Oatmeal Cut-Out Cookies - Dinosaurs and #4s

    Syd's 4th birthday is just around the corner, and I have a quite a bit of fun experimenting on cheap but fun ways to make it entertaining. You can see many of the activities I did over the summer and am planning for his birthday on my Pinterest board here. But the most recent addition to the 'dance of experimentation' was the Oatmeal (a.k.a., healthier than store-bought) Cut-Out Cookies.

    The first time I made these, Syd was about 18 months old, and none of us liked them, much. I honestly do not recall where I found the recipe. It was handwritten in his book, so I'm going to assume I copied it hastily out of a magazine. Regardless, they were rather flavorless. However, they did cut out well. That's a bonus, right?

    Since Syd's birthday theme is dinosaurs, I thought it would be wonderful to have a simple cookie to go along with his festivities. Bonus - after tweaking the recipe, he wolfed them down, so I think I may have a winner. I was tempted to purchase a dinosaur cutter, but then realized I had his sandwich cutter that made 2 dinosaurs out of his grilled cheese. Problem solved! I did, however, buy a #4 cutter to accompany his brachiosaurus cookies.

    Oatmeal Cut-Out Cookies

    Preheat the oven to 375* (I think this is a little hot; I went to 350*)
    1 cup unsalted butter - (I usually let mine sit out, but I've also found that 15 seconds in the microwave on half-power does the trick nicely.)
    1 1/2 cups sugar

    Blend these together well until fluffy.

    Whisk the dry ingredients together while this blends:

    3 cups all-purpose flour
    1 tsp salt (I used more - probably 1 1/4 tsp - and I used a coarser salt than the regular table salt - it added a subtle but nice surprise every once in awhile as you bit into the cookies that blended well with the sweetness.)
    1 tsp baking soda
    1/4 tsp baking powder
    Cinnamon - (I'm a nut for cinnamon, so I don't measure. I dump some in and after I've whisked the dry ingredients together, I smell them. If I can't smell cinnamon, I add more. Simple enough. You need to measure to your own taste.)

    After the butter is fluffy and the dry ingredients are whisked well:

    2 eggs - beat these into the sugar mixture well, one at a time, incorporating each egg well.
    1 Tbsp vanilla - (I love vanilla, too - I used vanilla paste instead of extract. Yes, that says Tablespoon - think about all the absorbing ingredients - flour and oatmeal? It needs the extra punch.)

    Slowly add the dry ingredients to the wet, mixing well. Afterwards, add in 2 cups of dry oatmeal, folding this in by hand.

    Roll the dough to 1/4" and cut-out. Spread on prepared (greased - blech - I used parchment paper) pans. Bake at 350-375* for around 10 minutes or until lightly brown.
    These were test cookies - I plan to add icing to the top for Syd's birthday so the 4 looks like a 4. And this is the only dinosaur that survived, so it looks a little sad, but the sandwich cutter worked very well. Either way, these are yummy! I hope you enjoy!

    Saturday, February 2, 2013

    I'm Pretty Sneaky - Black Bean Brownies


    What can I say?

    I've begun to earn the reputation at school of always adding some vegetable or another to baked goods. Zucchini bread; carrots to applesauce cake, etc. Well, this time, I made Black Bean Brownies!!

    Let's be honest - who doesn't get so caught up on balancing life, work, family, chores that we make mistakes w/ our diet - or providing for our families in that arena. This way, you don't have to worry or feel guilty about missing some component. Making these this evening also followed on the tail end of a trying virus that had Syd eating almost nothing, so getting protein and roughage in him while he ate chocolate is worth it all!

    The best part? My boys like them!!

    1/2 can (of 16 oz cans) of black beans, rinsed and drained
    3 eggs
    4 Tbsp flour
    3/4 cup sugar
    1/4 cup cocoa powder
    pinch of salt
    3 Tbsp oil
    vanilla
    nuts - which I woefully left out - but here's hoping Syd continues to outgrow his allergy!

    Blend it all (except the nuts) in a food processor and pour into a greased baking pan. Bake at 350 for approximately 30 minutes. The top should be set and the edges should be starting to pull away from the sides of the dish.

    Happy Veggie Baking! Let me know how your recipes turn out!