Powered By Blogger

Tuesday, April 4, 2017

Dandelion Cookies

Continuing on with my fascination of dandelions (and their light floral scent and taste, plus their incredible health benefits...), my son and I made dandelion cookies this past weekend. If you recall, I attempted to make Dandelion Jelly earlier this spring. But more dandelions have since bloomed, and we have not yet mowed, so dandelions I must use whilst I can. 


My son begins to prep the bright, open flowers (only use fully ripe blooms from dandelions that have been picked in clean areas - no mowing, no nearby car exhaust, no spraying for weeds, etc.) by snipping the yellow petals and stamens from the bloom heads. You'll need about 1/2 cup of these, which you'd think isn't much, but surprisingly, will not fill as quickly as you'd expect. Thankfully, I had quite the number of perfect dandelions in my yard.


 Save the part you don't use. I collected these to put into a jar for making salve - with the heads I collected that I did not use.

**You can freeze the heads, but be careful of ice crystals and their subsequent added moisture when you thaw them. Depending on what you're making, you will  want to dry them slightly before adding to the recipes.


My son is adding the remaining heads and the shorn heads to a large jar, to which I will add enough good quality olive oil to begin soaking the heads to make my salve.


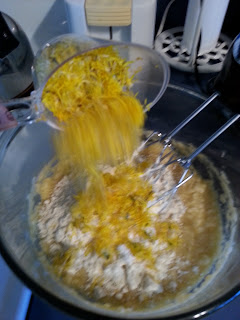
Add the flower shavings to your batter, mix, and drop in dollops on a parchment paper covered cookie sheet. Bake approximately 15 minutes, allow to cool, and enjoy!


They're so pretty!


Mine spread and ended up more like tuiles than cookies. But that did not diminish their taste. They're lovely. They're light and slightly-floral. And they didn't last.

Dandelion Cookies

1/2 cup coconut oil
1/2 cup honey
1 cup of gluten-free flour
2 eggs
1 Teaspoon vanilla
1 cup of oatmeal
1/2 cup of dandelion flowers

Preheat the oven to 375*.
Whip together the wet ingredients. 
Sift together the dry ingredients. 
Fold into one another. 
Fold in the flower petals. 
Drop by spoonfuls onto a parchment paper covered cookies sheet.
Bake approximately 15 minutes, or until lightly browned, and allow to cool.
Enjoy!

They're healthy, easy, and won't last! Let me know what you think of these!

Saturday, April 1, 2017

Dandelion Jelly... er.. Dandelion Syrup

I am new to the wonders of dandelions. I'd heard of eating the greens as long as I can remember, but... dandelions are weeds, right? Really best reserved for blowing the puffs around or merely omnipresent in a child's memory of summer days, bike riding and kickball playing - complete with drinking water out of the hose at your neighbor's house. Who would've thought I'd find myself, years later, wandering through my yard, picking the beautifully yellow heads of this weed?

Last spring, after searching for some recipes on the internet for honeysuckle, I came across a page that talked of the advantages of dandelion. Curious, I began to research the use of dandelion for many recipes as well as ills. 

I am not a doctor. However, I have found that, for flavor alone, I really appreciate the earthiness of dandelion tea, and I've seen firsthand the benefits of dandelion salve. I'll post instructions for those another time. Today is all about dandelion jelly!


I usually pick this bowl full - I'm not positive how much it holds. I would guesstimate that it is around 5 cups. I know I didn't need this many, but I couldn't let them go to waste! 

**Be sure to only pick dandelions from a yard that is not near a street, nor one that has been sprayed for weeds, etc. You'll be ingesting these, and you don't want remnants of exhaust, weed killer, or gasoline on them! I pick dandelions only until we begin mowing, and then I must say goodbye to my lovely concoctions. 


Next, I filled my tea kettle to the top with water and set it to heat up. I poured the entire contents over the dandelions, then promptly covered the bowl with plastic wrap and left it to steep, and cool off, overnight.


I left my spoon on top to ensure the weight kept the steam from lifting the wrap.


The next day, I strained out the blossom heads! These will go promptly into my garden for compost!


If I were making salve, I would have left the liquid as it was on the right. However, because jelly should have a lighter taste and is prettier when the light shines through it, I put a coffee filter in my colander and strained the liquid a second time through that (you can see the bare edge of the filter in my red colander). The bowl on the left shows the difference - it is much more clear than the original.


I should say that before I even started straining the flower heads, I started heating up my jars and lids. By the time I had the first batch of jelly simmering, the jars and lids were ready to be filled.

Dandelion Jelly

3 cups of dandelion tea
3 cups of sugar
2 Tablespoons of lemon juice
1 teaspoon of vanilla extract
1 package of pectin

Bring the ingredients to a boil and allow a hard boil for at least a minute.
Spoon into the hot jars and loosely tighten the rings around the lids. Leave at least 1/4" of headspace.

Once you have enough for your canner, place back into the pot and bring to a boil. Make sure you have about an inch of water above the tops of the jars.
Boil for 10 minutes.

Remove carefully and let cool on a dry towel. Wait for the staccato, symphonic 'thok' of the lids sealing as the jars cool.


This is my second batch - I didn't get quite as much out of this batch. I think I filled my jars more fully on this one than the first. But, in all, I ended up with 12 jelly jars of dandelion jelly.


Aren't they beautiful? My honeysuckle jelly was, initially, the same color. However, I added rose petals from my rose bush and it turned a lovely shade of red. I think, if I do a second batch, I'll do the same to the dandelion jelly.


So, shortly after finishing the canning process, my son had baseball practice. I left the jars cooling. A few hours later (long first practice of the season!), I came home and found that my jelly was not as thickened as I would like it to be. However, it is delicious (I tasted the spoon after I filled the jars) and it smelled like honey, so I am fairly certain I will still enjoy my dandelion syrup. I may alter the pectin ratio in the future.

Next up, I plan to try to make dandelion cookies. I'll be sure to let you know how those turn out! And, if the spring continues as it has, I should have enough heads to make more salve. I took stock of my batch from last year and am nearly out, so that obviously means it is time for more. I'll document that as I go, too. It really is wonderful.

If you try to make anything dandelion, let me know! I have fallen in love with these happy little flowers - they make me smile as much now as they did when I was a child!

Wednesday, February 22, 2017

Four Thieves Vinegar

Legend has it that in the 17th century, during the re-occurrence of the bubonic plague in France, nearly a million citizens succumbed to the disease. As the cities were ravaged, a group of thieves somehow managed to survive the dreaded plague. It is said that this group of people doused face masks with an herbal concoction that helped them with their immunity. The thieves (originally grave robbers) were able to enter the houses of those who had died and rob them of their valuables. The combination of antibacterial and antiviral herbs and vinegar kept them from suffering from the same fate as those they robbed.

I made Four Thieves Vinegar last  year. To me, due to the combination of herbs, it tastes a lot like Thanksgiving dinner. I, personally, can't stand vinegar, though, so I still had a hard time getting it down. I need to try to mix it with warm water and honey.

Currently, our winter has been incredibly mild. Subsequently, germs have not been killed off, schools have not been closed due to snow, and the spread of colds and flu have drastically reduced my class sizes. And, quite frankly, I'm paranoid anytime a student comes up to me asking for a nurse pass.

Obviously, it is time to make more elderberry syrup and a new batch of Four Thieves Vinegar. We are currently healthy in my house and I will do whatever I can to escape the "plague" of 2017.


Depending on where you look for the recipe, there are several variations. Ultimately, the most important aspect of the recipe is that you use good quality organic raw apple cider vinegar (I use Bragg's) and garlic.

Other herbs that I add to the mix are:
- dried rosemary
- dried sage
- dried thyme
- lavender
- ginger
- dried hibiscus


**As always, I am not a physician. Please check with your doctor if you have any questions.
Be careful if you use wormwood - Those who should be cautious are anyone who is nursing or pregnant, or suffer from a kidney disorder, a seizure disorder, porphyria, or a ragweed allergy)

****************************************
Four Thieves Vinegar Recipe

- 1 quart raw, organic apple cider vinegar
- 2 Tablespoons fresh garlic, chopped
- Your choice of other mixed herbs. Options are: rosemary, sage, thyme, lavender, wormwood, ginger, mint, black pepper, cayenne pepper, coriander, chilli pepper, rue
Use approximately 1-2 tablespoons each

You have several options for making the concoction. I've used both methods, depending on need and time.

Option I:
1. Peel and crush the garlic cloves and boil the garlic in the vinegar for a few minutes.
2. Add the rest of the herbs and allow to simmer for another few minutes.
3. Allow to cool down on the stove (steeping further).
4. Store them in a clean bottle and allow to sit for a few days.
5. Give a good shake before you use! Store in the fridge to ensure the vinegar doesn't turn sour.

Option II:
1. Combine all the vinegar and herbs in a clean jar.
2. Store in a cool, dark place for 2 weeks, allowing all items to steep. Shake daily.
3. Strain out the herbs and return the vinegar to the jar.
4. Store in the fridge!

The vinegar can be stored for up to 6 months.
******************************************

When I got home this evening, I made both my elderberry syrup and the Four Thieves Vinegar.

If you feel illness coming on, or if you're around those who are ill, or if you've been suffering from a cold or virus for a few days and are tired of feeling sick, take a shot of this in the morning, or mix it into a mug of warm water with honey and lemon.

Happy brewing, everyone! Let me know your thoughts!


Sunday, September 25, 2016

Thoughts on Aging and Hiking Sharp Top Trail

"Life is not about the destination, but the journey."
I have always been a mid-line outdoorsy girl. I grew up camping with my family and we used to go on hikes a lot in both Wisconsin and Kentucky. When we moved to Virginia, there were trails and roads that went through 'hollers' we would travel frequently on our bikes. I loved it all.

But time moves on and things happen and I'm usually more caught up in obligations than in taking pleasure for myself. Now that my son is 7, though, I am able to once again enjoy more on my own, since his Daddy can do more with him.

One such item is a hike to Sharp Top near the beautiful Peaks of Otter in southwest Virginia. On the last day with Mommy before school began, I took Sydney to Abbott Lake - it has a 1 mile, paved path around the lake that was perfect for a then-6 year old to explore. We examined plant life and butterflies - took pictures that focused on texture and color, and just enjoyed ourselves tremendously. I realized that Abbott Lake was at the base of three hikes that I'd heard of frequently but never climbed and decided that while my boys went to football games, I'd try my hand at these.
Abbott Lake sits nestled at the base of three mountains that offer beautiful views of the entire region. Sharp top isn't the highest mountain, but it is the steepest climb at a shorter distance. I knew it had been awhile since I'd been hiking, and even though I'm active, I'm not as consistent as I should be. It is because the hike is shorter that I chose to do this one first, even if it is steeper. Knowing that it has been years since I've actively hiked, and that I am a bit older than I used to be, I knew I needed to be careful.
I was... shocked. I expected to get winded. I expected to be a bit achy afterwards. But I did not expect to struggle as I did while actually hiking. I turned 40 this year. My knees aren't what they used to be. And I had thankfully thought to bring a hiking stick, but there were moments where my knees and my mind were definitely not in agreement. I don't feel 40. And I'm terribly stubborn. And I know there is a tremendous amount of 'mind over matter' in aging. But I cannot deny the fact that I had to go slower than I expected. It makes me wonder if I'll be able to accomplish some of the others that are longer hikes in a day.
I love this picture - it shows Abbott Lake at the base of the three mountains. I am at the top of Sharp Top. The mountain on the left is Harkening Hill. The one cut off on the right is Flat Top. I needed to take this picture because, from the lake, Sydney and I had made a point of looking up and identifying which mountain was which. It is the alteration in perspective that I wanted my 7 year old to see.
Ultimately, I had to recognize the difference in my abilities and my stubbornness. I had to make peace with certain aspects of my life. But I will never stop. Because I refuse to allow age and the human body to keep me from doing that which I enjoy and which brings me peace.
"It is not about the destination, but the journey." What realizations have you reached as you grow and mature? What have you had to make peace with in your life? Where will your journey lead you in life?

Saturday, August 27, 2016

Tomatoes, Hornworms, Braconids, and Robert Burns

To a Mouse, On Turning Her Up In Her Nest With a Plough - Robert Burns

Wee, sleekit, cowran, tim'rous beastie,
O, what a panic's in thy breastie!
Thou need na start awa sae hasty,
Wi' bickering brattle!
I wad be laith to rin an' chase thee,
Wi' murd'ring pattle!

I'm truly sorry Man's dominion
Has broken Nature's social union,
An' justifies that ill opinion,
Which makes thee startle,
At me, thy poor, earth-born companion,
An' fellow-mortal!

I doubt na, whyles, but thou may thieve;
What then? poor beastie, thou maun live!
A daimen-icker in a thrave 'S a sma' request:
I'll get a blessin wi' the lave,
An' never miss't!

Thy wee-bit housie, too, in ruin!
It's silly wa's the win's are strewin!
An' naething, now, to big a new ane,
O' foggage green!
An' bleak December's winds ensuin,
Baith snell an' keen!

Thou saw the fields laid bare an' wast,
An' weary Winter comin fast,
An' cozie here, beneath the blast,
Thou thought to dwell,
Till crash! the cruel coulter past
Out thro' thy cell.

That wee-bit heap o' leaves an' stibble,
Has cost thee monie a weary nibble!
Now thou's turn'd out, for a' thy trouble,
But house or hald.
To thole the Winter's sleety dribble,
An' cranreuch cauld!

But Mousie, thou are no thy-lane,
In proving foresight may be vain:
The best laid schemes o' Mice an' Men,
Gang aft agley,
An' lea'e us nought but grief an' pain,
For promis'd joy!

Still, thou art blest, compar'd wi' me!
The present only toucheth thee:
But Och! I backward cast my e'e,
On prospects drear!
An' forward, tho' I canna see,
I guess an' fear!

For the first time since my son was born, I planted a garden. We decided, together, to plant pumpkins, peppers, beans, and tomatoes. My pumpkins fared well enough. The peppers never produced. The beans did ... poorly. However, my tomatoes took off. I was able to eat my fill this summer, can for this winter, and am still getting viable tomatoes even though the vines appear dead. This has made me rather happy and I am anticipating doing more next summer. 

However, as I was examining the garden this evening, I found hornworms - the bane of tomato growers everywhere. Or, at least, gardeners who do not use pesticides. The hornworms will eat the leaves and stems and weaken the plants. 

My photo is horrible.


But when you see a hornworm that looks like this - leave it alone. The white "spikes" are cocoons of the braconid wasp - a natural enemy of the hornworm. By keeping this worm here, in my overgrown and tired garden, the wasp will ensure I have fewer hornworms next year. Yay!

It was through this image, though, that I thought of Robert Burns and his poem. You can see, I still have a tomato waiting to ripen, while two that were damaged by, probably our groundhog, hanging and rotting behind it. I had a prolific crop. Why worry about the few that were sampled by the groundhog, or damaged by the hornworm, when I have enough for myself? I love Burns' lines: 
I doubt na, whyles, but thou may thieve; 
What then? poor beastie, thou maun live! 
A daimen-icker in a thrave 'S a sma' request: 
I'll get a blessin wi' the lave, 
An' never miss't!

"I doubt not that you may thieve;
What then? Poor beast, you must live!

Words to live by. It drives home the fact that, in teaching my son that he needs to distinguish between what he needs and what he wants, I am asked to consider that on a daily basis, as well. We should all consider it more. Share more. Love more. And don't sweat the small things like a solitary hornworm on your tomato plants. 

Sunday, October 4, 2015

Keeping the Damp Out - Homemade Split Pea Soup

Last weekend, after a veritable drought this summer, my son was supposed to have his 6th birthday party outside at a putt putt park. We had a the first real rain we'd had since early July. And it was a cold, windy, rain-coming-sideways rain that eased up at times, but fell in absolute sheets moments later. Fiddlesticks.

One day of a break between that system and the next. And we got hit so hard with the second system that flooding became an issue. So much so that after school activities were cancelled several times, and we got out of school early on Friday. 

This second system was to blow through just as Hurricane Joaquin was then supposed to hit. Joaquin has not turned out to be the beast initially expected, but we're still recovering from floods and the skies have not cleared. It's dank, gloomy, and the perfect day for a bowl of soup.

Growing up, my Mother used to make split pea soup on a regular basis. As a child, I hated it. Something about the texture just turned my stomach. Or maybe it was because she blended everything and it had only one texture - I'm not entirely sure. But as an adult, I tried it again and fell in love with it. Thankfully, my husband enjoys it as much as I do. 

My recipe is very easy - it can effectively be made with nothing more than the peas, carrots, and ham. However, I also add onion, garlic, and basil. I use plain water, not stock, as the salt in the ham is usually enough to flavor the soup, and any added salt can make it too salty. It is very healthy and filling, too.

Homemade Split Pea Soup
Start with a bag of dried peas. Slowly pour the bag into your hand, allowing the loose peas to slide through your fingers, keeping watch for stones or clumps of dirt. The peas are sorted in the warehouses, but it never fails that the time I think I don't need to look through the peas are the times I later find a clump of dirt or a pebble the same shape as a pea.
Add about 6 cups of cold water and bring to a gentle boil. At this point, you want to get the peas to begin to open up.
When the peas look like this, turn off the heat, cover, and let sit for about an hour. The foam will dissipate somewhat, but after the hour passes, rinse the peas and drain, stirring up the peas to release the hidden gasses and the greenish foam. When the peas are relatively clear, add more cold water and put the pot back on the heat.
I add about a shot glass of flax seed - flax is very good for your health, but it is a hardy seed, not releasing the healthy oils unless chopped up or boiled for a long time to open the hull. Something like this soup is a perfect way to release healthy oils. I add about a cup of chopped carrots, 2-3 cloves of garlic, about a tablespoon of basil, and, in this case, about 1/4 of an onion. My husband doesn't care for the texture of onion but I love the flavor. I usually use dried onion for that reason, but my 1/4 onion was beginning to look a little sad, so I chopped it very finely.
Add the ingredients, and bring back up to a gentle boil. You may be tempted to taste the soup here. That's fine, but focus on the flavors of individual ingredients, not the need for salt. It will need salt, but the ham will add what you need.
While the soup warms up again, cut up the ham. I buy a single slice with center bone. Trim the fat, but make sure you put the bone in the soup. The marrow is very healthy and adds a nice richness to the soup.
Make sure you stir regularly. After the peas begin to thicken and break down, turn down the soup to low. I half cover the pot with the lid to allow it to cook down but also keeps it from splattering the stove. When your soup looks like this (see below)...
...begin to stir on a regular basis. This is where you have the possibility of the soup burning. The peas thicken up and clump on the bottom, and require diligent supervision. I don't mean that you're a slave to the stove, stirring constantly, I just mean that as you putter around, or, as I made drop biscuits to accompany dinner, I would pause every once in awhile to stir up the clumps.
The soup is ready when the peas show very little form individually. Taste it to make sure it suits your palate. The process takes some time, but I promise you won't be disappointed.
 
If you make this recipe, I'd love to hear whether you like it!

Homemade Split Pea Soup
1 bag of split peas, examined
 -Gently boil the peas for about 10 minutes, then cover and let sit for an hour. Rinse well and refresh     with cold water (about 6 cups).
1 cup of chopped carrots
1/2 an onion
2-3 cloves of garlic
 -Chop the vegetables and add to the peas. Bring it all to a gentle boil.
1 slice of ham, fat trimmed, chopped. 
  -Add the ham to the soup and let the entire mixture cook down

Low and slow is the way it goes from here on out. Stir frequently and turn down the heat. 

It is perfect on a day like today, dank and gloomy, or even better in mid-February when the wind is blustery and cold. Enjoy your soup!

Saturday, October 3, 2015

Making My Witchy Brew - Homemade Elderberry Syrup

Approximately two years ago, trying desperately to find something that would help my son breathe better and survive seasonal allergies, I heard about elderberry syrup. Now, I was raised in a home that practiced some herbal homeopathy. My mother is a very good cook and she would not only make teas and poultices for illnesses and injuries, but would also use herbs in cooking that served many purposes. I have continued that tradition.

Elderberry syrup was something I had not heard of before, which surprised me, but I researched it and found quite a bit that seemed to validate the fact that elderberries had medicinal qualities. I then began to look for recipes, knowing I was merely gathering ideas and that the final result would be my own.

I found one that seemed to suit my wants and needs. I followed the recipe the first time, and found the result to be delicious. Consistent use while coming down with a cold, or after suffering from one also showed that it worked. And this past fall's horrendous ragweed season proved the point even further, when I made it and gave it to the entire family on a daily basis. Within two days, we were all breathing much easier.

Ironically, last November, I had the distinct pleasure of attending a talk at a local college to hear Dr. Michele Tarter, a professor at The College of New Jersey, speak about Witchcraze - the history of witches. Essentially, the original definition of 'witch,' prior to 1486, is something to be proud of - it is merely a wise woman who helps others - either medically, emotionally, etc. The original witches were doctors and teachers. They cooked and counseled. They used homeopathy and lent a shoulder to cry on and offered hugs and hot tea.

I am a witch. As a teacher, I counsel, I educate, I offer hugs with advice. And, some days, I even offer hot tea. And at home, I certainly use healthy cooking and lots of love, listening, and herbs to try to take care of my boys. I am proud to call myself witch, and found great delight in having my students who accompanied me to hear Dr. Tarter call me a hag - a wise woman who offers advice.

That being said, I am making use of my 'witchy wiles' to share my recipe for homemade elderberry syrup. It seems proper that my first blog in the month of October be about a brew that anyone can make, and that can help you survive the re-awakened ragweed after Hurricane Joaquin passes us.

You can buy elderberry syrup in your local health food store or co-op. But it is ridiculously expensive, and if I make it homemade, I can use local, raw honey, which  provides increased protection against our local pollens.

You first need to obtain elderberries. I did some research, and found these to be priced well, organic, and the customer service is consistent. I buy in bulk, which will last us a few months, depending on colds and viruses we bring home to each other.
Put about 1 cup dried berries into a large pot. I am really tempted to buy a cauldron to make my elderberry syrup, but haven't given in, yet. I add 2-3 cinnamon sticks, 2-4 pieces of ginger, and approximately 8-10 dried cloves. All these spices have known antimicrobial or antibiotic properties, which can help a great deal if you're drinking this to get over a cold or the flu.
Add about 6 cups of water and bring to a soft boil. Simmer for at least 40 minutes.
Here's where you need to take note - Elderberries naturally have cyanide in them. Boiling the berries for this length of time removes the cyanide present in the berries. Just make sure you keep away from the steam when the mixture first begins to boil.
I tilt the lid, leaving space at the back of the pot so the steam is never in my face. And I do not allow my 6 year old near the stove when I first start making the syrup. After it has boiled down, allow it to cool. I have begun boiling in the evening and letting the pot sit overnight with a lid. By day, it has fully cooled and any other nutrients have leached out of the spices and into the water. Then, use several layers of cheesecloth to strain the liquid. Squeeze the detritus to get as much "good stuff" as possible. The remains can either then be composted or put in the trash.
Rinse the pot to make sure no pieces of berry or cloves are left, and pour the liquid back into the pot. Add local, raw honey to taste - I used approximately 1/3 of a cup to sweeten the mixture. One would think the berries would add some sweetness, but it is actually quite bland until the honey is added.
Store in the refrigerator. I give everyone about 1 tsp (using the medicine cups that come with children's medicines) once a day when you're treating allergies or protecting everyone from illness. I usually give 1 tsp every 6 hours when I am actively treating a cold or viral infection.
If you'd rather not take a teaspoon directly, it can be used on ice cream, pancakes, within tea, etc.! Happy brewing, my little witchy friends. If you try this recipe, please let me know how it turns out!
*****************************************************************
Elderberry Syrup
1 cup dried elderberries
2-3 sticks of cinnamon
2-3 pieces of ginger
8-10 cloves
6 cups of water

***Update: I now also add dried Thyme and dried Hibiscus flowers - both are very good for upper respiratory infections. I also have begun to make honeysuckle syrup and can that, and I use the honeysuckle with the local honey to sweeten the elderberry concoction. Honeysuckle is also very good for upper respiratory infections. 

-Bring the ingredients to a boil, but stay away from the steam, as elderberries contain natural cyanide that will cook off.
-Allow the mixture to cool. 
-Strain the liquid through several layers of cheesecloth.
-Stir in local, raw honey to sweeten (about 1/3 cup)

Store in a large jar in the refrigerator for up to two weeks!
********************************************************************
Disclaimer: I am not a medical doctor. And I still make ready use of western medicine when symptoms and common sense tell me it is time to go see a doctor. Use your head! Seek professional help for any questions to be safe!